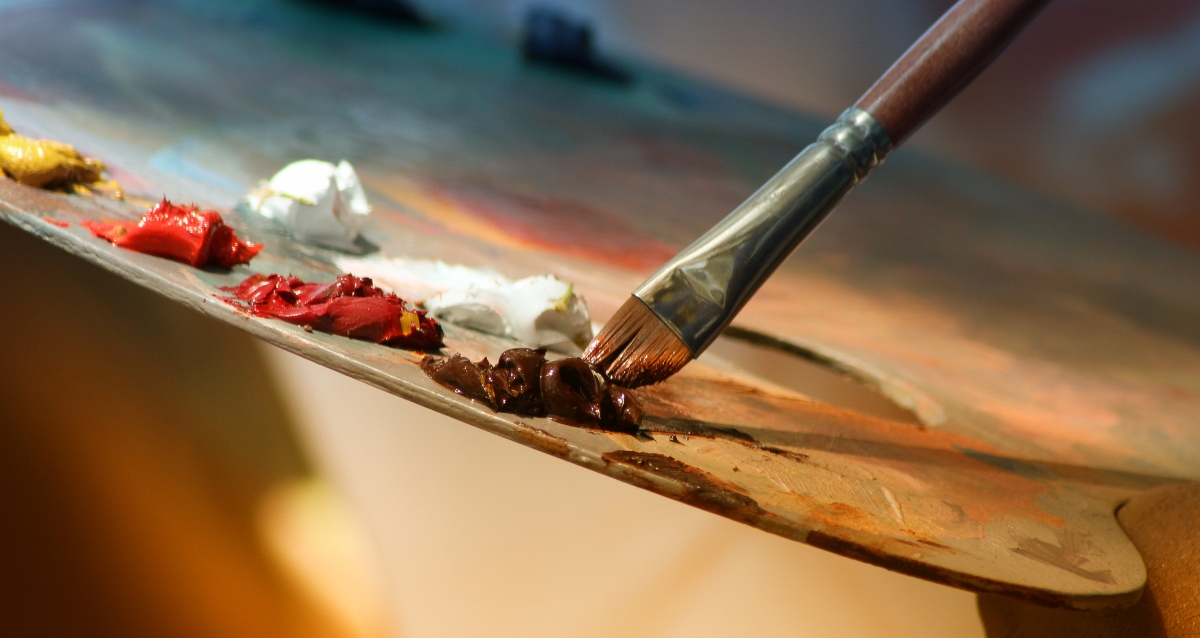
As a beginner watercolourist, you often feel lost and unsure of how to practice your new hobby.
If you’re a novice, you often wonder if there are better techniques to help improve your painting process.
Thus, you sit there wondering: “What are the different watercolour techniques that I should know?”
You’re a busy person, so I’ve written this thorough article to:
- Explain 9 of the most fundamental watercolour techniques
- Show examples of what each technique looks like
- Provide instructions to help you perform each technique correctly
1. Paint from Light to Dark
As a watercolourist, you should know this incredibly important watercolour lesson: it’s better to paint from light to dark.
It’s not a strict rule. But it’s undeniably one of the most important lessons to learn because watercolour is a transparent medium.
This means that each underlying layer is partially visible when you paint on top of it. By layering your painting, you’re able to build up the values to create depth.
To check your paint’s transparency, conduct the following test:
- Use a marker to draw a solid black line or circle on your paper
- Swatch each of your paints by painting over the black line or circle
- Observe which paints layer over the blank ink without obstructing it. These are the transparent paints
- Observe which paints create a solid or semi-solid colour over the black line. These are the opaque paints
-
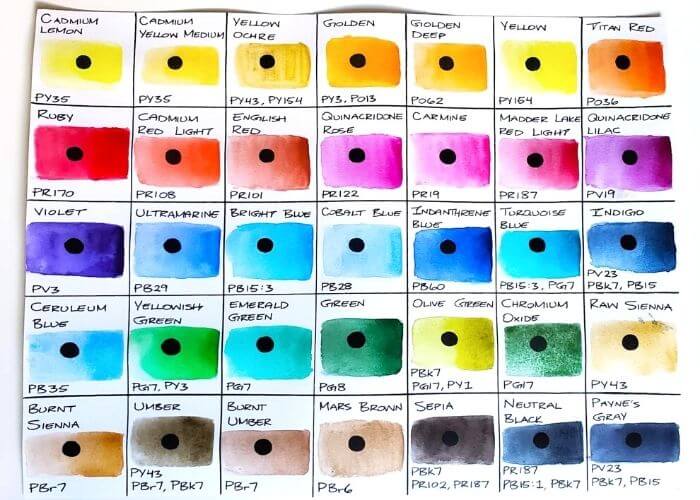
Photo Credit: Miranda Balogh, White Nights Paints Watercolour Chart This colour chart was created for the White Nights Watercolour paints with 36 whole pans, which is my current favourite set of paints. The colours are pigmented and they blend smoothly.
However, if you start off too dark, it can be rather difficult to salvage your painting because it’s harder to lighten dark colours.
As a beginner, you should start with a lighter wash of paint and then slowly build up the layers. This way, you’ll be able to learn which of your paints are more transparent than the others.
Layering your paints also helps you learn about proper water control.
This knowledge will help inform your decisions about which colours you’ll use in future paintings. After all, no one wants to accidentally create muddy colours.
2. Wet on Wet Watercolour Technique
Note: In these demonstrations, I’m using the Silver Black Velvet Brushes which are my favourite brushes. I highly recommend them for their quality and affordability.
The second skill on this list in an invaluable watercolour technique for beginners. It’s called the wet on wet technique.
The wet on wet technique is applied by wetting the surface of a paper and then adding paint to flow into the wetted area. Here’s what to do:
- First, wet the paper with an even coat of water. Make sure the water glides gently across the page and that it isn’t pooling into beads of water.
- Second, load up some paint onto your brush and glide it across the wetted area. Alternatively, you can dab drops of the colour all over the wetted area.
- Third, watch as the pigment flows across the wet surface.
- Lastly, repeat step 2 by using a different colour. Watch how the colours interact as they flow into one another and blend together.
An example of the wet on wet technique can be observed in the galaxy sky shown below.
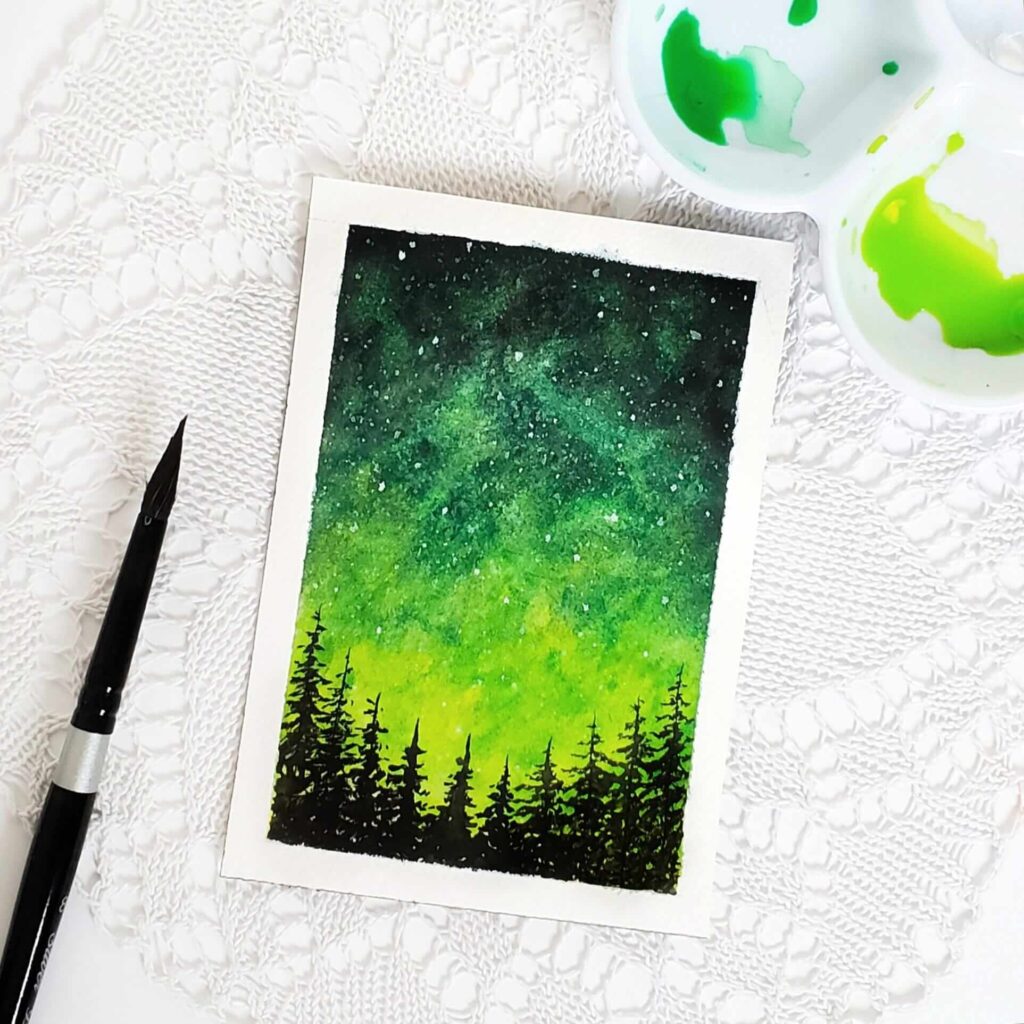
Image Credit: Miranda Balogh The wet on wet technique is a great skill because it teaches you how to loosen up and accept the unpredictable nature of watercolour.
If you’d like to see a watercolour tutorial with images that show you how to use the wet-on-wet technique to create a lovely variegated wash, then check out this sunset watercolour silhouette tutorial.
What’s more, the wet on wet technique is often used when creating clouds, sunsets, and landscapes.
As well, this technique is used to create watercolour galaxies and night skies because it allows the paint to flow in naturally random ways.
3. Wet on Dry
Knowing which watercolour technique to use and when is a big part of learning how to effectively paint with watercolours.
The wet on dry technique is another common method that watercolourists use to achieve greater precision in their artworks.
In this technique, don’t pre-wet the paper. It’s as simple as:
- Loading up your brush with a colour of your choice (make sure the paint is somewhat diluted with water for easy application).
- Dragging the brush across your paper to create strokes.
The wet on wet technique differs from wet on dry insofar that you have greater control over where the paint is placed.
With the wet on dry technique, you are able to control its movement in a more predictable manner because you’re applying the paints to a dry surface.
For this reason, the wet on dry technique is often recommended for more precise details such as creating branches, mountains, and blades of grass, to name a few examples.
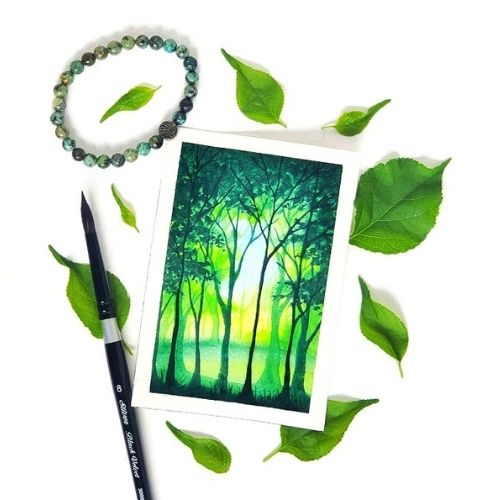
This technique was necessary so that I could make precise tree trunks and branches.
This painting was created by following a Skillshare class by @brushpaint.n.everything
4. Dry Brush
The dry brush technique is an awesome skill that can add a lot of interesting texture to your paintings.
To achieve this result, you need to make sure you are doing a few things correctly:
- Do not dilute your paints! Add a tiny amount of water to the paint, but make sure the consistency is still mostly solid (80:20 ratio of paint to water)
- Drag the brush across your paper to create patches of unevenly distributed paint. The goal is to create many small isolated patches of dry paint.
- If your brush is too watery, dab it on a paper towel and try again. The water should not be flowing if you are using this technique correctly.
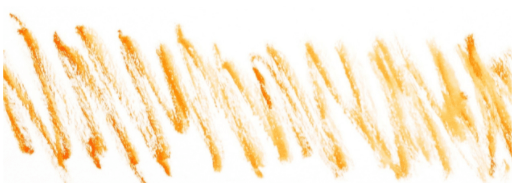
The dry brush technique can add a lot of unique texture to your paintings. For instance, applying it to mountains can give them a rocky, snow-capped, or jagged appearance.
As well, you can use this water colour technique to create uneven bark on a tree, or it can be used to accentuate the fur of an animal.
Of course, there are many more watercolour techniques than the 9 discussed on this list. But these are the fundamental skills that you should learn before moving on to advanced watercolour techniques.
So be brave and experimental!
Try using these different techniques in your watercolour paintings to create all kinds of neat effects and textures.